
FX
Since this is not an extensive session of CorelDRAW, so we will not be going in a lot of details about the power of CorelDRAW. Having said that…we could not possibly sign off without giving you a glimpse of the Effects menu.
The Effects menu contains some snazzy options for you the user. Effects commands can be combined and used with other program features to provide almost total control over the appearance of an object and its relationship to other elements of a design.
Before you experiment with some of the effects, you need to adjust your CorelDRAW setup. Since the roll-ups base the units of measure on the rulers, you need to set both to the same scale. Open the Layout menu and choose the Grid and Ruler Setup option. Set the units to inches. Make sure that you are not working in the Wireframe option either.
The Envelope
An envelope is a special kind of bounding box that enables you to shift the outline of an object or block of text. You can use more than one envelope at the same time and copy it from one object to another. Clearing the envelope restores the object to its original shape.

Choose the Text tool and type Special Effects. Using the options available make sure the text is 24 point and typeface is MS Comic Sans. Actually you don't have to be particular about the same typeface, at the moment any old typeface will do.


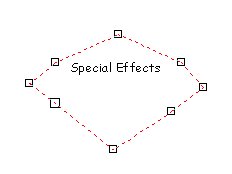
After you have typed in the words, select them and open the Effects menu. Click on Envelope to open the roll-up menu. If you do not see a dashed red outline around the words, then click on Add New within the roll-up menu. By default the first shape on the left-hand side is chosen, keep that selection. Keep the Putty selection as well. Before you click on the Apply button, you have to make the words look different. Click on the top middle handle around the words, and pull it up a bit. Next the lower middle button needs to be stretched as well, then the ones on the side. Till it looks close to like a stretched box with one end pulled towards you. Now you can click on Apply and see the end result. If you are not happy with what you have, then you can experiment a bit more till you are entirely happy and sure about your handiwork. It might also be a good idea to try out the different shapes available and see what matter of wonders you could create.

Envelopes are tools for defining the flow of a path, and thus the shape of an object. As with converting text to curves, they offer a lot of control. The effect of an envelope is like putting the object on a piece of clear plastic and then being able to twist it in any direction or shape. The type of envelope placed around it determines the exact way the object behaves.
Blending In
Blending is a powerful effect that enables you to shift the shape of one object into another's in a series of steps. The Blend command is easiest to describe after showing an example of it.
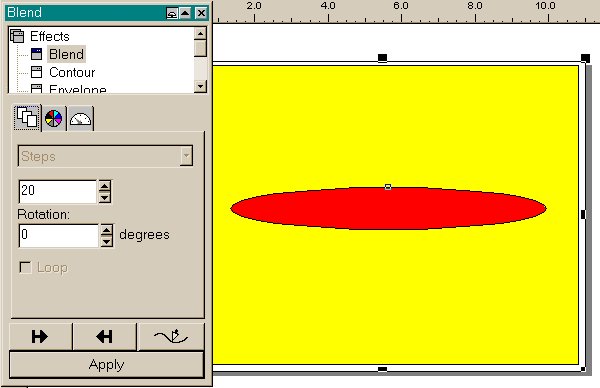
Open a new file. Draw a large square/rectangle, then place an oval in it. The oval should preferably be on the thin side. Give the different objects different colors. For e.g. green for the square, and yellow for the oval. Now select both objects using the Shift key.
Now open the Effects menu and choose the Blend roll-up option. An on-screen roll up menu should appear. Make sure the icon on the far side is selected, the one, which looks, like a number of tiled pages. Also make sure that 20 is the value in the entry box under the word steps. Click on the Apply button.
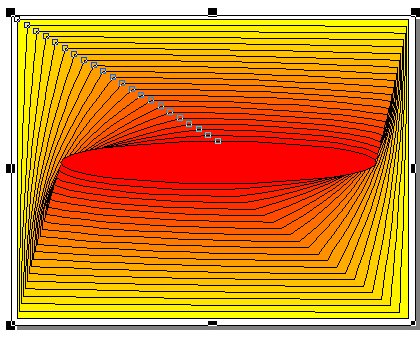
The Blend operation will create a series of 20 objects gradually changing from a square into an ellipse. The fills and colors also change from one color to the other in a series of steps.
To make a blend, you must have two objects selected. They cannot be a set of grouped objects. Once you give the command, a set number of intermediate objects is created, each one in turn shifting its shape so it looks more like the target object at the end of the string. All the parts are dynamically linked so any change to the color, fill, or shape of an element will result in the entire blend being recalculated.
A blend can be fitted to the path of another object in a drawing, which forms an external control element of the blend, this kind of blend offers you the ability to use interval spacing instead of the number of steps to determine how a blend is drawn.
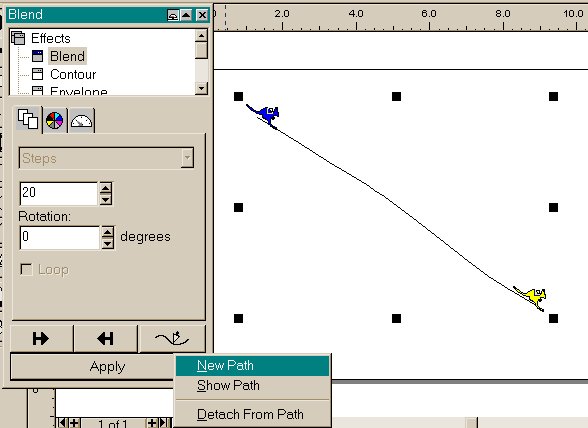
Open a new drawing, set the Pencil tool to Bezier mode, and draw a set of curves that look like the slope of a hill going down from the upper left to the middle of the page.
Use the Symbol tool and put in a symbol, which gives the feeling of action. Place it on top of the line "hill" then duplicate it and place the copy below the bottom of your "hill". Give each symbol a different color fill. Shift-click and select both the symbols.
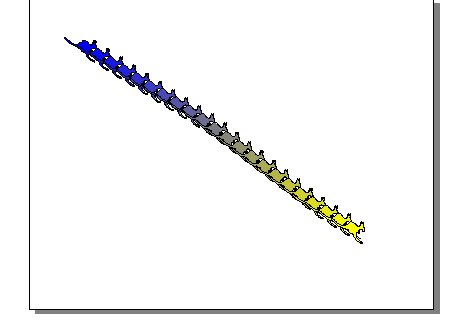
Open the Effects menu, and Blend. Choose 20 steps, and click on the arrow the one that looks like an arrow pointing at a curved line. From the options, choose New Path. The cursor will change to a wavy arrow pointed down. Place its tip on the curve you drew before placing the symbols. Don't set any other options, just click on the line and then on Apply. The final effect will have the symbol seemingly racing down the "hill".
In Perspective
Between the involved discussions of Blend and Envelope we overlooked the simple but effective tool known as Perspective. There is no special roll up menu, just interactive bounding boxes and X-shaped guides that represent the virtual vanishing points.
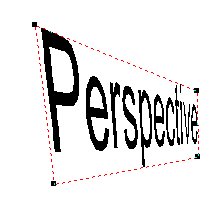
Open a new drawing and type the word Perspective. Make sure it is selected; then select Add Perspective from the Effects menu. A red dashed bounding box will appear around the text, and the Shape tool will be automatically selected.
Drag the points on the corners of the bounding box. As you drag the box around you will see the text change shape.
You can add a perspective to an object and then select the Add Perspective command again. A new bounding box will appear and you can manipulate the perspective further, allowing some twisted and bent appearances.
Extrude
The Extrude roll-up menu offers a variety of commands for adding depth, a three dimensional look that resembles old hot metal type or carved letters. It is also the easiest way to create boxes and produce lighting effects on objects with several sides. The Extrude feature is only touched upon lightly here, as it is not possible to discuss all its features in this introductory manual.
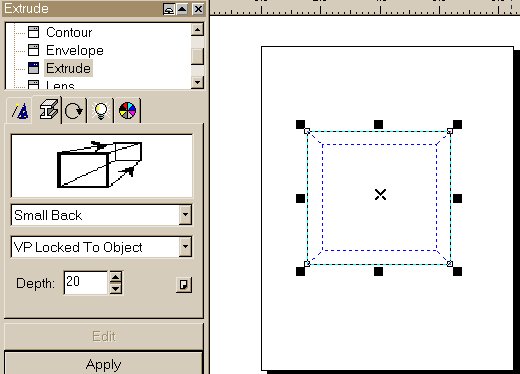
Start with a sample to see how this effect works. Open a new drawing and set the display to Wireframe. Make sure the page layout is set to landscape. Draw a square.
Open the Effects menu and choose the Extrude roll-up or use the Ctrl-E shortcut. The roll-up menu will appear and your object will have a x and a dashed line inside of it. The x is a vanishing point, it gives you an indication of the direction of the effect. The dashed lines that are the same shape as your object act as a wireframe extrusion. Change the Depth setting in the roll-up to 30.
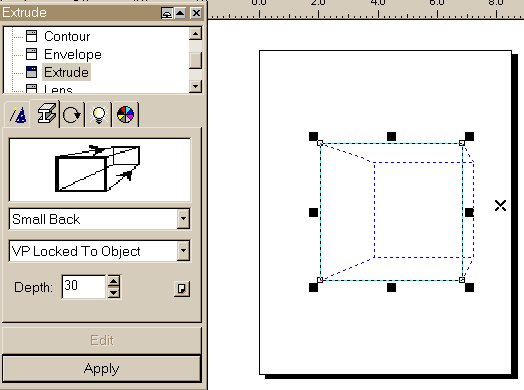
Now drag the vanishing point over to the right. Notice how the wireframe follows the movement. It is showing the outline of the extruded object. Click on the Apply button.
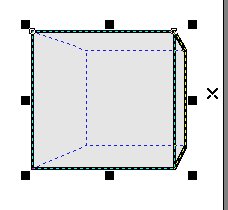
Give the object a light gray fill and an 8-point outline. You can change the view to normal as in not the wireframe view. You will be able to see the object in a three-dimensional view.
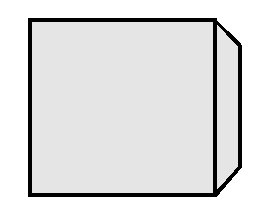
If you use any other tools to select the object, the Extrude effect is stopped.
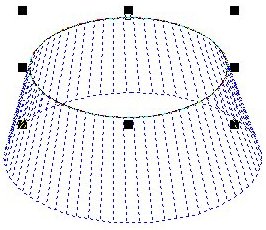
In another example you could draw an ellipse in a new page. You could put the vanishing point above the ellipse. Give it an outline and a colored fill. Or you could type in some text (your name) and play with the Extrude effect.
The Extrude as well as the other effects in the Effects menu are quite useful, once you get to know them. The only way to know them is to experiment with different shapes and see what you can make with them. Some times it is best to mix them up.
The other Effects within this option group will not be discussed in this introductory introduction thing…but there is no reason why you shouldn't experiment!
The object of this short introduction was to make you aware of some of the basic tools within CorelDRAW 6. You have seen the Interface, the basic tool bar, and the toolbox. You have experimented with some of the tools within the program, by doing some exercises. In the end you also had a brief look at the Effects menu, and the way you can mould objects to your wishes.
It wasn't meant to be a discussion page, some explanations had to be given in order to make the tool and the task understandable.
We hope that by now you have been filled with enthusiasm and fire about the power of CorelDRAW 6. On a somber note we have to tell you that there is still a way to go, but if you have the patience and persevere, you can get there.
Good luck!
|
Top of the page |
To the previous page |
To the main page |