Text
Until now, we have focused primarily on CorelDRAW's ability to create objects for illustrations. In the real world most applications also use words to get their message across. Entering text in a drawing is easy. All you do is place the Text tool cursor where you want to begin, and type. You can manipulate the text with outlines and fills. All the program's special effects and transformations can be applied to text.

There are several ways to place text objects in a drawing, depending on the amount of letters and how they will be used in the drawing. If you type text directly onto the page you are limited to a maximum of 250 characters per block. A block is body of text ended with a hard line return. CorelDRAW refers to this kind of text element as artistic text. This is the way to place type that will be modified using special effects. It is the easiest way to create small blocks of text for use in a drawing.

Paragraph text is used for longer passages of up to 4,000 characters per paragraph and is contained in a frame. You use this form of type for imported text (like that from you favorite word processor) and type that runs more than one column.
There is no fixed limit on the number of text objects that can be placed in a drawing, unless you run out of system resources (such as memory). Most of the features and commands are the same for both classes of text.
This might be a good time to try out some Type activities to get you acquainted. Open a new file. Activate the Text icon and bring it over to the upper left-hand corner of the page. Click once. The cursor will become an I shape at the insertion point. Type Are we having fun. The text will appear on the page as you type, starting at the location where you clicked the mouse button. Press Enter and add another line. Is this fun. Press Enter and add, What a fun day.
Use the Pick tool to click on the block of text. Move it to the center of the page. Using the handles on the sides, expand the block so that the text gets enlarged, take care to leave some space on the top and sides.
If you change your mind about the text and would like to edit some words later you can simply click on the block where you want to make amendments. Another quick way to edit text is to press the Ctrl-Shift-T (that means hold down the Ctrl and Shift keys simultaneously and then tap T) and the Edit Text dialog box appears.
The quickest way to change the font type and size is to highlight the block of text first, then choose the Text option from the menu bar, and pick Character, this opens a dialog box which show the different options available. You have seen this option when you worked through the first Exercise, i.e. the garage sale sign.
Now you can try and rotate the text and skew it as well while you are at it.
Fit Text To Path

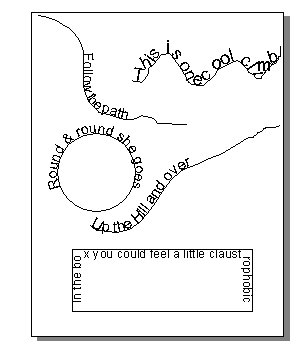
Have a look at the figures below:
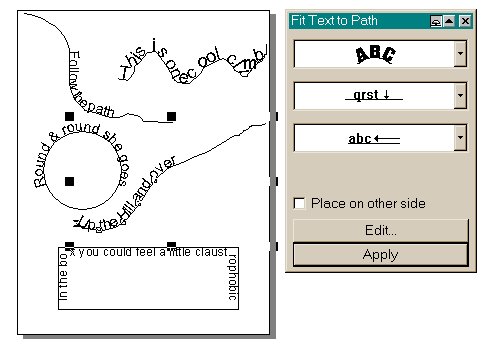
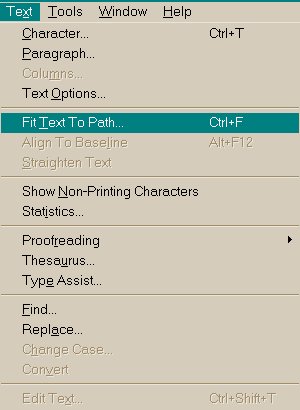
You might have noticed that the text is following the lines or around the corners or curves. This is one of the coolest things you can do with the one of the text attributes. To Fit Text to Path you need to open the Text menu from the Menu bar. You can only fit Artistic Text to a path. Before you can use most of the options in this roll up, you must select your text and an object that you want to use as the path, with the Pick Tool. You can fit text to straight and curved lines, rectangles, ellipses, or even other letters.
The above figure shows how to access the option of Fit Text To Path. The figure on the right shows one of the objects selected with the range of options available in the roll-up menu. As with all roll-ups, you must click the Apply button to apply the option you have selected in the roll-up.
Symbols
Symbols form another class of objects in CorelDRAW. They are added to your document via the Symbol roll-up. In the earlier versions of CorelDRAW, the symbols menu was placed within the text options. In version 6 the Symbols have been moved to the Tool bar status. The toolbar icon resembles a star. The symbol is a useful tool if you want to add line drawings of certain figures, and then color them in.
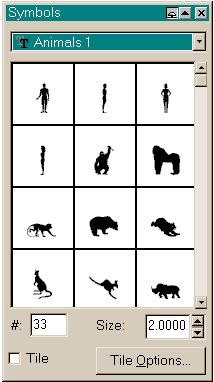
At the top of the Symbols roll-up is a drop down list that contains all the available symbol categories. Select the category you want to view. Use the scroll bar and arrows to see all available categories.
To place a symbol on the page, first hold the mouse down on the symbol to display a box around it. Then, drag the mouse onto the page. A copy of the symbol moves with the mouse. Release the mouse where you want the symbol to appear. If you know the number of the symbol, you can type the number into the # text box, and a box automatically appears around the corresponding symbol.
The Size option lets you set the size of the symbol on the page. The default size for a symbol is 2 inches.
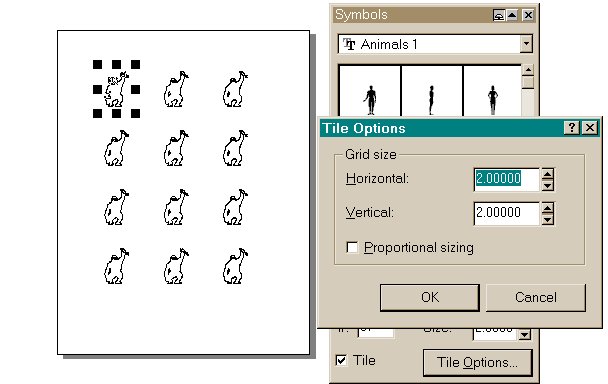
Check the Tile option in the Symbols roll-up if you want to create a continuous tile pattern from a single symbol. Click on the Options button at the bottom of the Symbols roll-up to open the Tile dialog box. The Horizontal and Vertical options let you set the size of the tiles. When you drag a symbol onto the page with the Tile option checked, a continuos tile pattern of the symbol appears.
|
Top of the page |
To the previous page |
To the next page |
To the main page |