
Queries and Reports
When making queries, there will be times when you will want to select records that fall within a range of values, not just one particular value. You can accomplish this by using a relational operator as part of the search criteria. A relational operator lets you specify a range of criteria to be used in the search. In the table below there are a few examples of relational operators.
Relational Operators used in Access queries
|
Operator |
Example |
Explanation |
|
< |
<500 |
Less than |
|
> |
>500 |
Greater than |
|
= |
=500 |
Equal to |
|
<= |
<=500 |
Less than or equal to |
|
>= |
>=500 |
Greater than or equal to |
|
AND |
>AND<10 |
Logical "AND" connector, both conditions must be true |
|
OR |
>OR<10 |
Logical "OR" connector, either condition must be true |
|
NOT |
NOT 500 |
Logical "NOT" expression, all values except 500 |
To specify a range of values in a query, you simply enter an initial relational operator in the Field column, followed by the value to be searched.
For example, to select records whose Amount field value is "$400" or more:
In the Queries tab, click the New button, Design View, and then OK
Click Customer List in the Tables tab and then the Add button
Click the Close button in the Show Table dialog box
You now are able to view the Select Query design screen
Use the drag and drop technique explained in an earlier exercise (pg. 4 last section) to add the Customer Number, Last, Amount, and State fields row to the lower section (pane) of the Select Query design window.
Click the Criteria row of the Amount column and type >=400
This query will ask for only those records whose Amount value is greater than or equal to $400. Note that you do not enter the currency symbol, nor would you enter commas to set off thousands in large amounts.
You can further refine the search by sorting the query by customer number. To do this:
Click the Sort cell of the Customer Number column
Click the down arrow of the Sort cell, and then Ascending

You can now run the query to see the results, by clicking on Query, Run, or by clicking on the Red exclamation mark on the toolbar.
The dynaset or the result of your query should look like the one below:

Close the dynaset without saving.
You can use the Update Query feature to replace the contents of the fields that meet set criteria. The criteria can be set in the same search field or in a different search field. A search field is a field in which you instruct Access to look. The update query changes the data in a table when it is run.
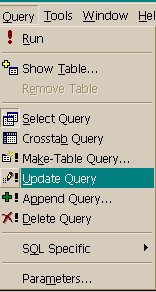 The following exercise will change the data in City fields that read Scullin to Grand. It does not change all records, but only that meets the stated condition.
In the Queries tab, click the New button, Design View, and then OK
Click the Tables tab, Customer List, and then the Add button
Click the Close button in the Show Table dialog box
Click Query (File Menu), Update Query
The Update Query Design screen appears. An update query is used to change field values
Locate the City field in the Customer List box by using its vertical scroll bar if needed
Drag and drop the City field from the Customer List box to the Field cell of the first column of the query (in the lower section).
Click the Update To cell of the City column, and type Grand
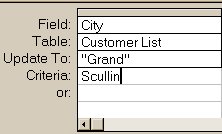 Click the Criteria cell of the City column, type Scullin, and press Enter, or click on the red exclamation mark on the toolbar.
This condition translates as, "Change the City field for each record whose city is Scullin to Grand"
A dialog box informs you of the change about to take place and asks for your confirmation, click Yes.
When you have run the query the change is not shown in a dynaset, as the change has been done in the table itself. Minimize the Query window, in the object window, choose the Tables tab, and open the Customer List table, to view the change.
The result of the query should be like the figure below

You can close the Table window now.
Maximize the Query window, and reverse the condition back to Scullin.
Close the Query window without saving the query. You should now be able to view your object window.
Creating Reports
A report is a view that presents data from records in a manner the user specifies and organizes. It is generally used to produce a printed output. You can create a report from a table or a query. The process is the same.
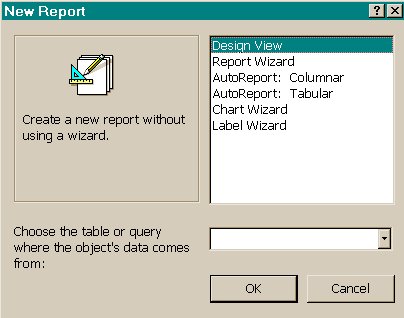 Access provides you with a list of wizards you can use to create reports. From the objects window, choose the tab Reports. Click on New, a list box informs you of the different choices you have.
Click on Auto Report: Columnar, which is the third choice on the list. Choose the table Customer List from the lower section of the New Report box. Click on Ok.
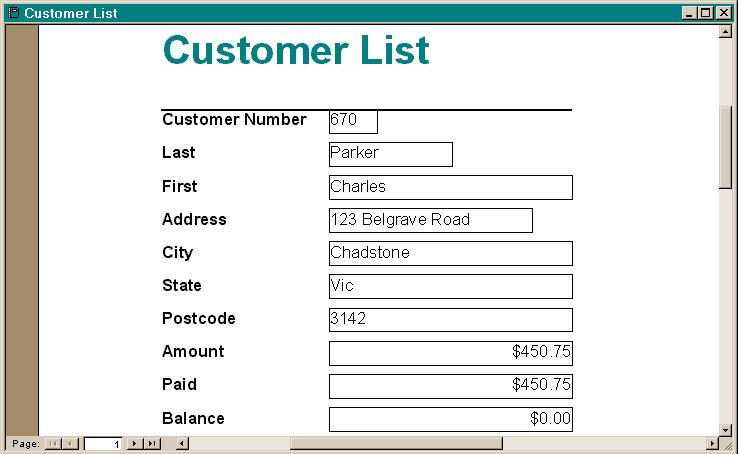
The Columnar report will be generated by Access for you.
View the Report as created by Access, and then have a look at the design screen of the report, by clicking on the set square icon on the toolbar.
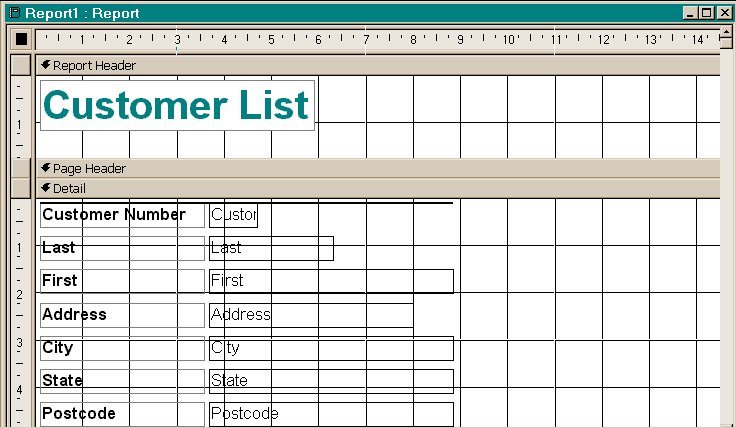 This design window lets you make changes to the Auto report, you can change the order of the fields, the display size, etc.
While you are in the design view you might notice the different tool icons displayed in the toolbar. These come in handy when designing or customizing your report.
 To get back to the report view, click on the icon on the toolbar on the extreme left-hand side shaped like a magnifying glass on a sheet of paper. Or you can click on the down arrow next to it and choose the third option, "Layout Preview".
You can close the Report window, without saving any changes.
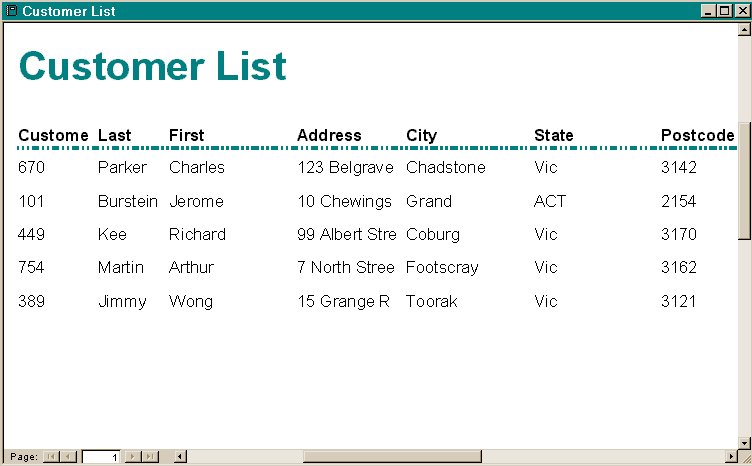
Choose New from the Report window again, and this time pick on the Tabular report in the Auto Report selection (fourth on the list). The Tabular report will look like the figure below:
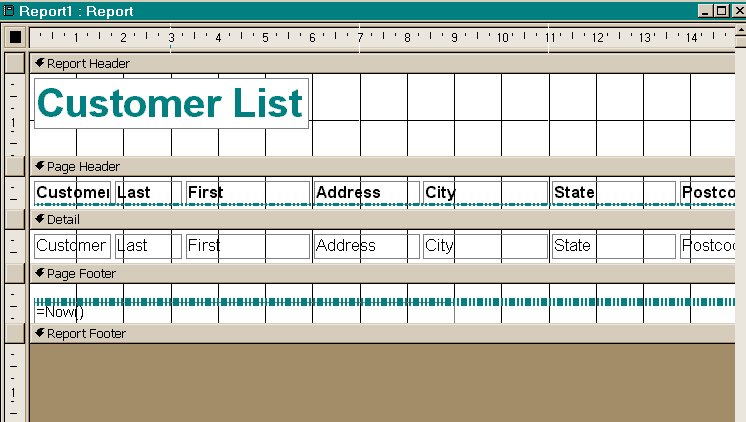
You can also see the design view of the report by clicking on the set square icon.
|
Top of the page |
To previous page |
To next page |
To main page |