Painting & editing
In this section we finally explain some of the Photoshop's painting tools. You may think these tools require artistic talent. In reality, each tool provides options for about any level of expertise. Photoshop offers get-by measures for novices who want to make quick edit and put the tool down before they make a mess of things. If you have experienced painting before, then you'll find electronic painting and editing tools more flexible, less messy, and more forgiving than their traditional counterparts. Having said that, you have to get used to their eccentricities first!
The tools (again)
Photoshop provides three paint tools: the pencil, paintbrush, and airbrush. You also get six edit tools: smudge, blur, sharpen, burn, dodge, and sponge.
Pencil: The paint tools apply paint in the foreground color. Unlike some other paint programs it allows you to paint a hard-edged line of any thickness.
Paintbrush: The paintbrush works like the pencil tool, except it paints in a line, which blends in with the background.
Airbrush: The airbrush is much like the paintbrush, except for some of the individual characteristics, which allow the user to create translucent line. But unlike the paintbrush, which applies a continuos stream of color and stops applying paint when you stop dragging, the airbrush applies a series of colored dollops and continues to apply these dollops as long as you press the mouse button.
The edit tools don't apply color; rather, they influence existing colors in an image.
Smudge: the smudge tool smears color in an image. The effect is much like dragging your finger across wet paint.
Blur: the blur tool blurs an image by lessening the amount of color contrast between neighboring pixels.
Sharpen: the sharpen tool increases the contrast between neighboring pixels.
Dodge: the dodge tool enables you to lighten a portion of an image by dragging across it.
Burn: the burn tool enables you to darken a portion of an image by dragging over it.
Sponge: the sponge tool takes the saturation and contrast from an image.
Techniques
You can draw a straight line with the line tool, if you haven't tried it yet, then have a go. Pretty hot stuff huh? Well you can actually draw a straight line by using the Shift key. To draw a straight line with any of the paint or edit tools, click one point in the image and then press Shift and click another point. Using the current tool, Photoshop draws a straight line between two points. To create free-form polygons, continue to Shift+Click with the tool.
To draw a perpendicular line, either a vertical or a horizontal line, with any of the paint or edit tools, press and hold the mouse button, press the Shift key and begin dragging in a vertical or horizontal direction. Don't release the Shift key until you finish dragging or until you want to change the direction of the line.
The smudge tool
When using the smudge tool, the performance depends in part on the settings of the Pressure and Finger Painting options. Both are available in the smudge tool options palette, which you access by pressing Enter when the Smudge tool is active.
Pressure: used as a percentage of the brush shape. This option determines the distance the smudge tool drags a color. Higher percentages and larger brush shapes drag colors farthest.
Finger painting: this option lets you apply a bit of color, which the program eventually blends in with the colors in the image.
The Sponge tool
The sponge tool does two things mainly, Saturate, and Desaturate, meaning when set to Saturate, and it either increases the color saturation or increases contrast in a grayscale image. Desaturate would do the opposite. Usually you would use the sponge tool when you want to curb a distracting color that seems to leap out of the image.
The brush shape
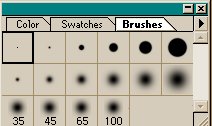
The brush shape is the shape of the tip of your cursor when you use a paint or edit tool. A big, round brush shape paints or edits in broad strokes. A small, elliptical brush shape is useful for performing hairline adjustments.
You access brush shapes by choosing Window, Palettes, Show brushes to display the Brushes palette with its pop-up menu. You can switch brush shapes from the keyboard without displaying the Brushes palette. Press the left-bracket key, [, to select the previous brush shape in the palette; press the right-bracket key, ], to select the next brush shape.

To edit a brush shape in the Brushes palette, select the brush you want to change and choose Brush options from the palette menu. To create a new brush shape, choose New brush.
Opacity
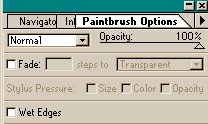
The opacity option determines the translucency of colors applied with the paint bucket, gradient, line, pencil, paintbrush, eraser, or rubber stamp tool. This option can be used when one of the above tools is selected, press Enter, this brings up the palette option window for the tool, the opacity feature is in the top section with a slider bar, by default set to 100%. At 100% the applied colors appear opaque, completely covering the image behind them.
Filling
To fill a selection or layer is to put color inside it: to stroke a selection or layer is to put color around it.
You can fill an area of an image with color in four ways:
The paint bucket tool: you can apply the foreground color or a repeating pattern to area so related color in an image by clicking in the Image window with the paint bucket tool.
To limit the area affected by the paint bucket, select a portion of the image before using the tool.
You can use the paint bucket to color the empty window area around your image. First, make your image window larger than your image, so you can see some blank canvas area around the image. Now Shift+Click with the paint bucket to fill the canvas area with the foreground color.
The Fill command: select the portion of the Image you want to color and then fill the entire selection with the foreground color or a repeating pattern by choosing Edit, Fill. To choose the Fill command without touching the mouse, press Shift+Backspace.
Delete key: after selecting part of the single layer image, or part of the background layer, you can fill the selection with the background color by pressing the Delete key. To fill the selection with the foreground color, press Alt+Delete or Alt+Backspace.
The gradient tool: a gradation (also called a gradient fill) is a progression of colors that fade gradually into one another. You specify a few key colors in the gradation, and Photoshop automatically generates the hundred or so colors in between to create a smooth transition.
To use the gradient tool simply drag across the image with the gradient tool to fill it with a multicolor gradation.
Create a Frame
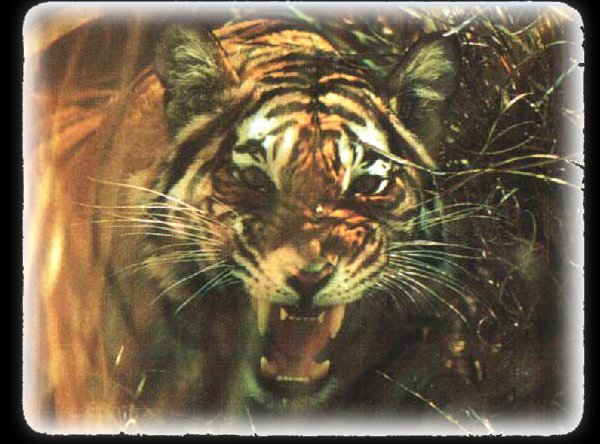
The following steps explain how to create an effect you can perform only with the paint bucket tool. The steps explain how to create an antique photographic frame effect.
Creating or Applying Strokes
Stroking is useful for creating frames and outlines. You can stroke an image in Photoshop in the following ways:
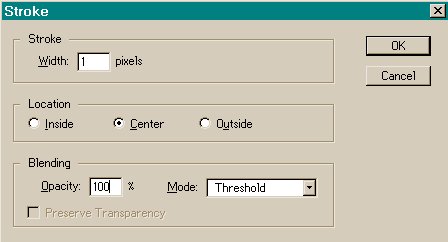
Using the Stroke command: select the portion of the image you want to stroke and choose Edit, Stroke to display the Stroke dialog box. Enter the thickness of the stroke in pixels into the Width option box. Select a Location radio button to specify the position of the stroke with respect to the selection outline. After you have clicked on Ok you may still see the selection highlighted (crawling ants), remember to deselect to see your changes. A quick way to deselect is to press Ctrl+D. The Stroke dialog box also includes Opacity, Mode, and Preserve Transparency options that work like those in the Fill dialog box.
When in doubt, select inside from the Location radio buttons. This setting ensures the stroke is entirely inside the selection outline in case you decide to move the selection. If you select Center or Outside, Photoshop may apply part or the entire stroke to the deselected area around the selection outline.
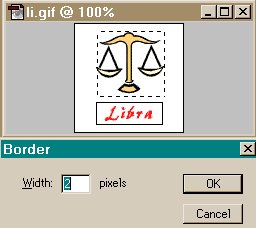
Using the Border command: Select a portion of the image and choose Select, Modify, and Border to retain only the outline of the selection. Specify the size of the border by entering a value in pixels into the Width option box and press Enter. To fill the border with the background color press Ctrl+Delete or Ctrl+Backspace. To fill the border with the foreground color, press Alt+Delete or Alt+Backspace. You can even apply a command under the Filter menu or some other special event.
Framing the image: To create an outline around the entire image, change the background color, to the color you want to apply to the outline. Then choose Image, Canvas Size and add twice the desired border thickness to the Width and Height options in pixels. Make sure the Anchor control has the center box selected. When you press Enter, Photoshop enlarges the canvas size according to your specifications and fills the new pixels around the perimeter of the image with the background color.
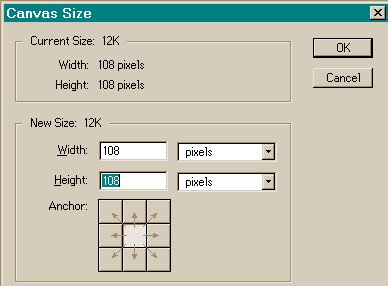
This can be illustrated by the image on the right, which has the canvas size dialog box open. You will notice the various options available, the anchor box is at the bottom where you choose the position, and in this case it should be the center one. The size of the image is displayed in the New Size portion, make sure you have the unit of measurement in pixels. In this case the Width and Height are 108 pixels, respectively.
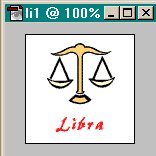
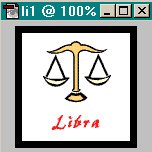
The image (li1) selected, as you will notice that at this stage it does not have a prominent border around it.
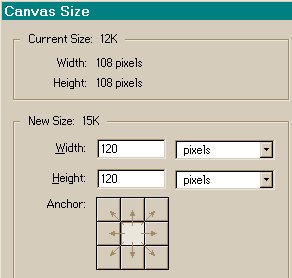
This image has the dialog box open, this time in the New Size portion the Width and Height in the dialog box have been increased to 120 pixels, respectively, and the anchor is in the middle.
This image is the final outcome to the steps above, you will notice that the image has a border (black) around it. In this case the background color was changed to show you the desired effect.
Arrows

In Photoshop you can apply arrowheads only to straight lines drawn with the line tool. To create an arrowhead, double click the line tool icon in the Toolbox to display the Line Tool Options palette. Enter a value into the Line Width option box to specify the thickness of the line, better known as the line's weight and then use the Arrowheads options:
Start: Select this check box to append an arrowhead to the beginning of a line drawn with the line tool.
End: Select this checkbox to append an arrowhead to the end of a line.
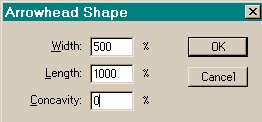
Shape: Click the Shape button to display the Arrowhead Shape dialog box. The Arrowhead Shape dialog box, contains three options, which enable you to specify the size and shape of the arrowhead as a function of the line weight:
Width: enter the width of the arrowhead in pixels into this option box. The width of the arrowhead is completely independent of line weight.
Length: enter the length of the arrowhead, measured from the base of the arrowhead to its tip, into this option box. Again, length is measured in pixels and is independent of line weight.
Concavity: you can specify the shape of the arrowhead by entering a value between negative and positive 50 percent into the Concavity option box.
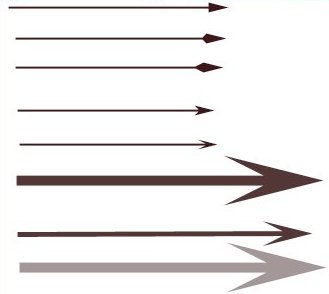
The image on the right is the result of different lines with different Concavity options, the bottom arrow has a fifty percent opacity value, hence the dimmed effect.
Back to the Top