Web Graphics
Graphics are what make the Web intelligible and invite us to come back for more. Graphics have brought the masses to the Web, images account for 90 percent of all Web graphics.
If you have any experience with the Web, you know small images are speedy images. By small I don't mean physical size. I mean small in terms of disk space. A 20K image that fills your screen takes less time to download and display than a 50K file no longer than a sticky note. It's the act of getting data through the cables and phone lines that takes the time.
The main thrust of this section is on file size. How can you squish the finest graphics you're capable of creating into the smallest amount of disk space with the least amount of sacrifice?
All Web graphics are RGB. Which basically mean that what you see onscreen is really what you're going to get. If you are blessed with a newer monitor than the image translated will be a lot better than what it would be on an older monitor. There are differences as well when you start looking at images across platforms. An image in a Macintosh computer will look brighter than what it may look like viewed on an IBM compatible PC. The reason is that it is the way the monitors are set up for the different systems.
GIF and JPEG are the file formats of choice for Web graphics. As mentioned in the section File Formats, GIF supports only 256 colors, so it is better for high-contrast artwork and text. JPEG applies compression, so it is better for photographs and other continuous-tone images.
By recognizing which formats to use when and how best to reduce colors, you can better ensure that visitors to your Web site will spend less time sitting on their hands and more time enjoying your site.
JPEG options
When it comes to saving photographic images, no format results in smaller file sizes than JPEG. The JPEG format decreases the file size by applying a compression scheme that actually redraws details in the image. Inside the JPEG Options dialog box, select lower Quality settings to put the screws to the image and make it go as low as possible. But in doing so, you also sacrifice image detail. Having said that in most cases the result is not discernable unless there is fine detail, which needs to be highlighted in the picture.

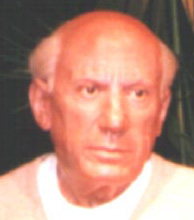 Take a look at the two images on the left hand side (no, he is not Gorbachev, this is Picasso), one of them was saved in Max mode (8) file size 18k, the other was saved in the Medium mode (3) file size 8 k. Can you tell which is which? Probably not a fair question since the pictures are small, but when did I ever say I was really fair either! The point is that if you require good quality prints then you ought to save them in the Medium mode of upto 4 at least. That is if the picture is depicting some fine detail. Otherwise if it were a landscape, then it would not really matter if the scale were down to 3 or even 2.
There is really no right or wrong way of saving JPEG images, but you may have to sacrifice quality over quantity many a times. Another thing to remember is that we are discussing image format for the Web here, for printing purposes you would use other file formats.
To save your image as a JPEG file, you would open File and then click on the Save option, or you could choose the other option of Save a Copy.
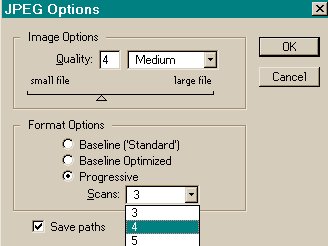
Format options: most Web browsers support two variations on the JPEG format. The Baseline (Standard) or sequentially displayed format displays images in line-by-line passes onscreen, left to right, top to bottom. The progressive JPEG format displays an image onscreen in multiple passes, enabling visitors to your page to get an idea of how an image looks right off the bat, without waiting for the entire image to arrive.
To save a baseline image for use on the Web, select Baseline Optimized. This format includes better compression methods that make the file even smaller than Baseline (Standard). You can generally reduce the file size by 5 to 10 percent using this option. Select the Progressive option to save an image that gradually appears onscreen in passes.
If you select the Progressive radio button, you can pick a number of passes from the Scans pop-up menu. Higher value results in a faster display of the initial image on your page, but it may also take longer to display completely onscreen because of all the incremental refreshing.
By providing an immediate, unfinished pass at your image, you're giving the viewer an early right of refusal. This is what the Web is really all about, providing the viewer with the choices and navigation.
GIF Images
The GIF format was born when only a few had access to a 1200 Bps modem. It supports a maximum of 8 bits per pixel, which translates to a max of 256 colors. GIF comes in two varieties, known as 87a and 89a, the latter supporting transparent pixels.
Despite some limitations, GIF has its uses. GIF is a much better format than JPEG for saving high-contrast line art or text. Take a look at the two images on the right, and left of this paragraph. The one on the right is in JPEG format, and the one on the left is in GIF format. The file size is 7K and 1K respectively.
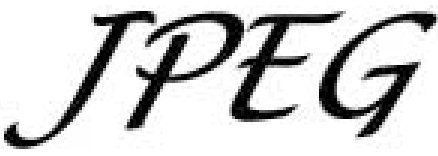
The image on the right has been blown upto 300 percent. You will notice that the JPEG format image has lost it, the jagged lines are visible, plus the area around the text is fuzzy.
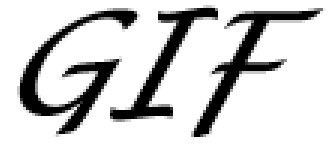
The GIF format image is still relatively smoother, it too has become a bit jagged, but the area around the text is still intact.
When you have created an Image you want to save as a GIF file, then the simplest way to do the file transformation is to open the File menu, Scroll down to the Export submenu, and choose 89a format. A word of caution here, when converting a JPEG file into GIF format, you may not get a small file size.
The current file whether it is in the JPEG format or the PSD format will not disappear from the screen; it will remain there with the present format. To see the GIF format image on the screen you will have to go to File, Open and then look for the file name with the GIF extension.
Scanning
Putting photos on the Web is a buzz these days, most of us usually end up putting up their entire photo albums on the Web. Converting the photos digitally usually does this. To convert photos digitally, you would need some hardware. The type of hardware you would end up depends on the cash you can spare. If you have enough to spare, you might dish out enough to buy a digital camera. Or you may be inclined towards investing in a Scanner.
Till only a few years ago there were the handheld scanners, which were within the reach of normal buyers, Flatbed scanners were far too expensive to be considered for home use. But all that has changed. These days' flatbed scanners are quite popular, mainly because they are cheap. And now they have become relatively easy to use. If you have a scanner attached to your computer and wanted to scan a photograph or any image, you could easily do so using Adobe Photoshop.
Most scanners come with a software within the package which can be used independently as well, but they do not give you much choices in the formats or the way that you can fix some of the photographs problems. That is the reason why when scanning, using an image editor program is a better idea.
Some scanners also give you the option of copying text as it is straight from the book. Without converting it into an image file. The method or mode used is called OCR, which stands for Optical Character Recognition. This method is generally used when a lot of prewritten/published text is to be used in a multimedia production. Multimedia Encyclopedia's are one example.
I am not going into the details of setting up a scanner; this is assuming that you have a scanner attached to the system, software (drivers) and all.
To initiate the scanning process, you need to have Adobe Photoshop open. You would then need to put in the photograph(s) / images on the glass plate of the scanner. Closing the lid gently may not be a bad idea as well.
Open the File menu, scroll down to Import, open the option TWAIN_32. This will bring up the hardware manufacturer's inbuilt software for scanning. Before it does it may take a minute or so to warm/wake up.
You would normally be able to preview the images you placed, but if for some reason you don’t, there should be a button titled, Preview. This will initiate the scanning process. Within the dialog box, there is a preview screen, this screen will now hold the preview of the images/photographs you have placed on the glass plate.
Along the edges of the images/photographs you will notice a frame with a black border. When you place the cursor inside the frame, which has your images/photographs, you will notice that the cursor changes to a four-sided arrow. This allows you to move the scanning frame anywhere you want to. If you had placed more than one image on the glass, you could pick the image that you wanted scanned moving the scan frame.
Or by expanding it, by placing the mouse cursor on the edge. When the mouse cursor changes its shape to an arrow, you could pull/drag with the cursor in either direction to expand/contract the scanning area. This technique will help you to pick certain parts of the image, if you don't want to scan an entire image.
Once you are happy with what you have picked then you could press the button titled Scan. The scanner's innards will move, and scan the picture. What really happens is that the lamp inside the scanner lights up, and photographs the image, and then sends it to the screen.
When you have finished scanning the images, you can then close the scanners program. This will leave you with the images that you have just scanned. If you want to scan another set of images then you could leave the software active. Simply replace the set of images, and do the scanning process described above. The reason you have to close the scanners program is that while that program is active, you can not work on the images.
If the images look upside down or look a bit on the side, you could initiate the Image menu, and scroll down to Rotate Canvas. This submenu lets you turn the image around, for instance if the image you scanned is upside down, you could click on the 180 degree option, and Photoshop will set it right for you. If you think the image is on its side, then you could use either the 90-degree CW (Clockwise) or 90-degree CCW (Counter clockwise), to rectify the solution.
It would be a good idea to save the image now. If you want to save the image as JPEG, then choose the option from within the Save dialog box. You will see further options on how big you want the file to be. Choose wisely.
Most scanners work in tandem with image editor or paint programs, much the same way described above.
Back to the
Top